Hello again! Today I bring you a pretty technical and slightly nerdy topic, but one I’ve been wanting to investigate for a long time. If you’ve ever played Pokémon from Ruby, Sapphire, or Emerald onwards, you’ve definitely come across Spinda, the panda Pokémon with infinite patterns.
The truth is that this pocket monster is an absolute technical nightmare for any developer trying to make a fangame or clone. At the same time, I think it’s a very interesting mechanic that enriches the world of these creatures. Today we’re going to dissect how it works internally in the original games, how it has been solved in other tools, and finally, how I implemented it in Godosters.
What’s so special about Spinda?
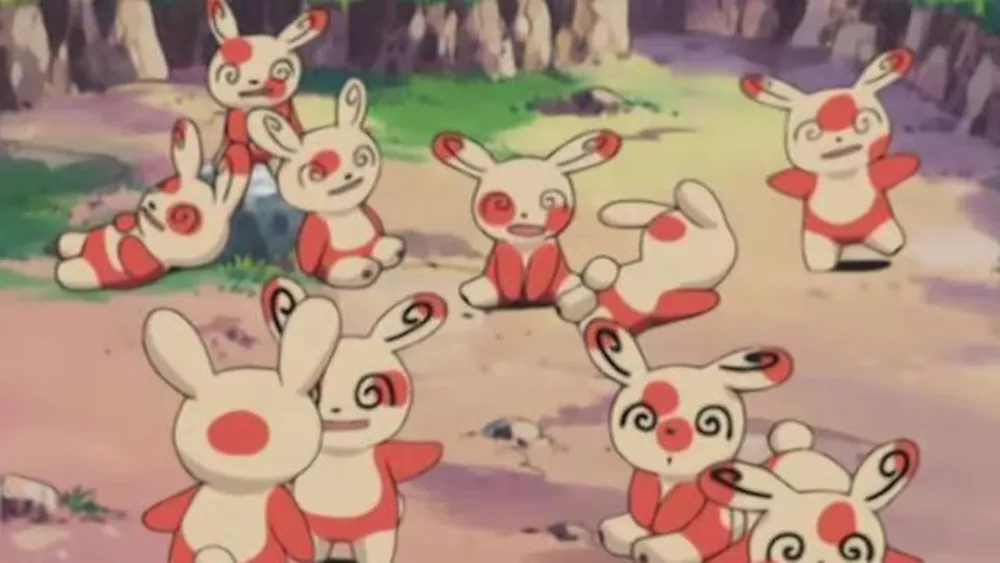
For those who don’t know, Spinda is a Pokémon introduced in the third generation that has a unique mechanic: its spots are never the same.
Internally, the game uses the Personality Value (PID), a unique 32-bit number for each Pokémon, to determine the exact coordinates of 4 spots on its face. This means there are no less than 4,294,967,296 possible combinations.
But how is this drawn on screen without having 4 billion saved images? Let’s take a look.
The original solution: Pokémon Emerald (Game Boy Advance)
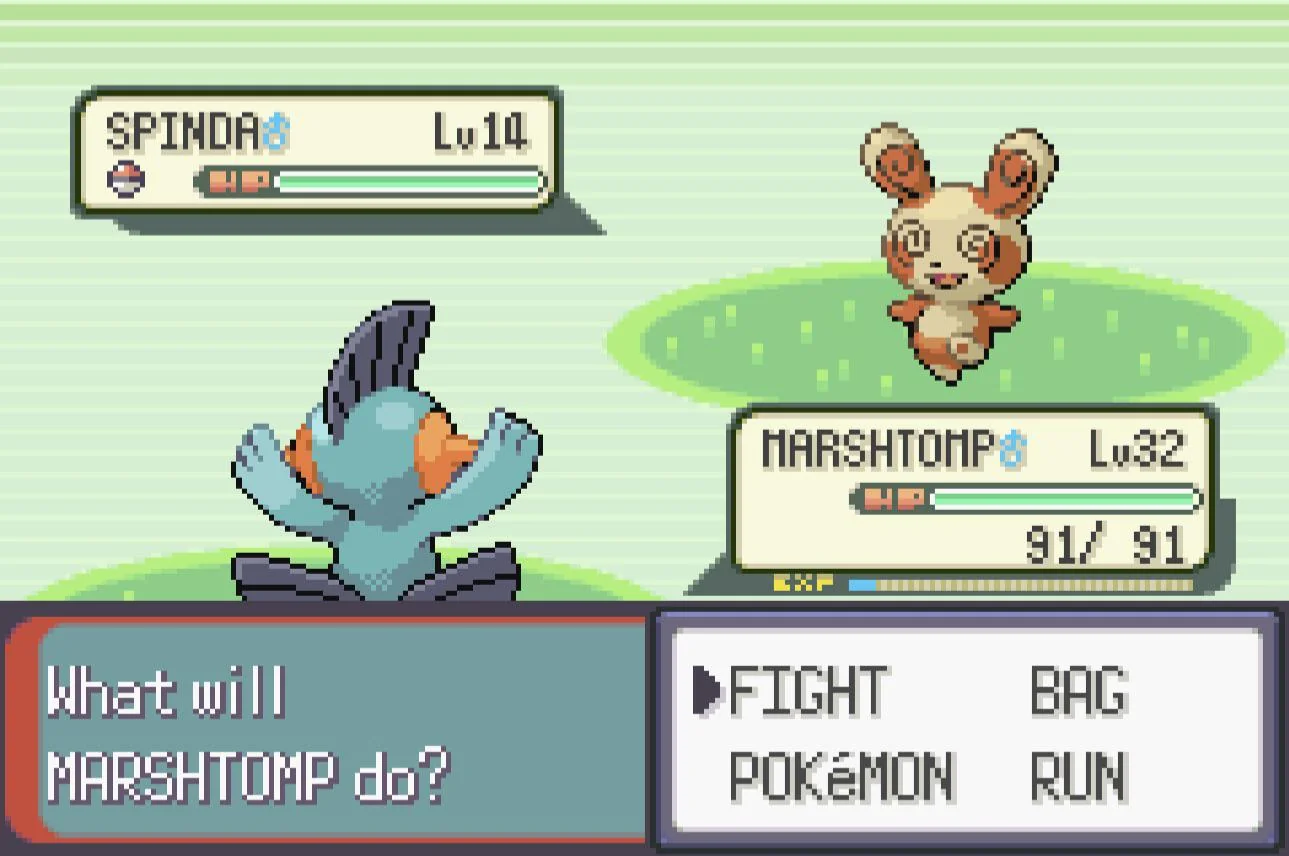
I dove into the decompiled pokeemerald code on GitHub to understand how they did it back in 2004 with the limited resources of the GBA.
Far from using polygons or weird rotations, the 4 spots are simply 16x16 pixel binary images (1 bit per pixel).


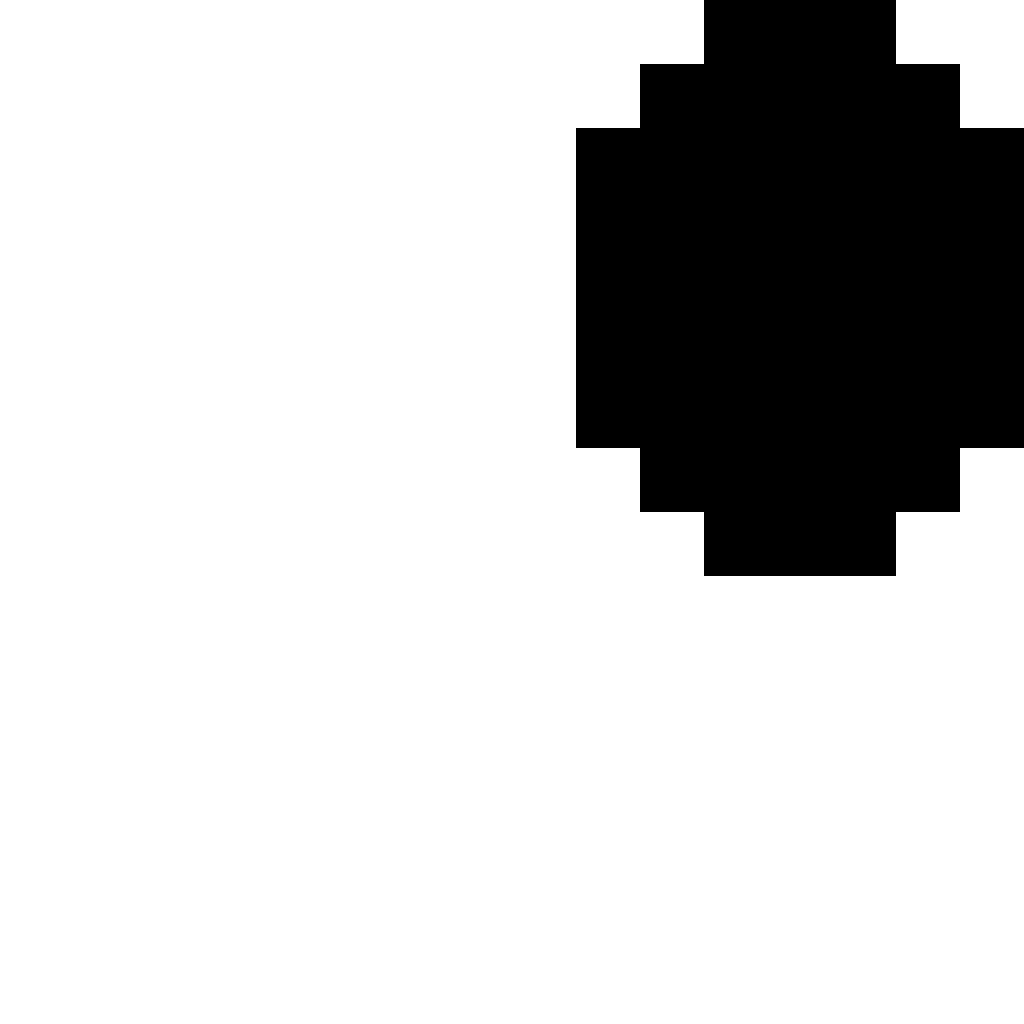

(Above: The 4 original binary textures extracted from pokeemerald)
The game takes the 32 bits of the PID and divides them into 4 blocks of 8 bits. For each spot, it uses the first 4 bits to calculate the X offset (between -8 and +7 pixels from its base) and the other 4 bits for the Y offset.
To put it all into perspective, here is the almost complete main function that does all the magic (view on GitHub) (Note: I’ve adapted it from a C macro to a normal function to make it easier to read):
| |
Briefly explained, this is the step-by-step of what this block does:
- Loops through the 4 spots.
gSpindaSpotGraphicsis simply a predefined data array that stores the base starting coordinates of Spinda’s face and the binary drawing of the 4 spot textures we saw earlier.- Calculates the final
xandycoordinates by adding the random offset extracted from thepersonality(the PID) to that base coordinate. - With a few
forloops going through each row and column of the 16x16 spot square, the C code works its magic with my beloved pointers to find which exact memory address in the console’s RAM (destPixels) corresponds to that pixel of the base sprite. - It checks the binary mask of the spot texture (
if (spotPixelRow & ...)), and if there’s drawing on that pixel, it calls the final macroTRY_DRAW_SPOT_PIXELto color it. - Finally, it pushes the PID number 8 bits to the right (
personality >>= 8) to be able to read the pseudo-random positions of the next spot in the next loop iteration.
However, as you can imagine, the game doesn’t just color that pixel wildly inside TRY_DRAW_SPOT_PIXEL; it first makes sure the destination belongs to Spinda’s skin, to avoid staining the black outlines or the transparent background.
Here you have the empty base sprite to which these calculations are applied in memory:

To paint the spot respecting the body boundaries, it uses the following macro in src/pokemon.c. Here I explain line by line the magic behind the check:
| |
if (((*(pixels) & (0xF << (shift))) >= (FIRST_SPOT_COLOR << (shift))): This line looks at the current color value of the pixel in RAM and checks if it’s “greater than or equal to” the lightest color of the palette corresponding to Spinda’s body (FIRST_SPOT_COLOR). Theshiftvariable is used because pixels in GBA (which are 4 bits per pixel) are sometimes grouped in pairs within the same byte.&& ((*(pixels) & (0xF << (shift))) <= (LAST_SPOT_COLOR << (shift)))): And besides, it checks if it’s “less than or equal to” the darkest color of Spinda’s body (LAST_SPOT_COLOR). This guarantees 100% that the pixel we are going to paint belongs exclusively to Spinda’s skin, and not its eyes or black outlines.*(pixels) += (SPOT_COLOR_ADJUSTMENT << (shift));: If the above conditions are met, it enters the final instruction, where a mathematical adjustment (SPOT_COLOR_ADJUSTMENT) in the palette is magically added to the pixel’s color, transforming it into the reddish color of the spot.
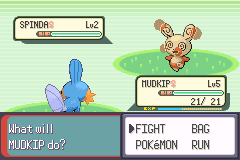
To make sure I had understood it correctly, I ran some tests. I decided to alter the original ROM, deleting exactly that same conditional check to force the game to draw the spots ignoring the body limits:
| |
I recompiled the modified game, and as you can see in this final screenshot taken from my original console :), the spots now float freely over the background and are painted over the eyes or black borders because they are no longer restricted to drawing only over the main body color:
The solution in Pokémon Essentials (RPG Maker)
We jump to the world of classic fangames. In Pokémon Essentials (based on Ruby and RPG Maker), the solution is much rougher because the engine isn’t built for this. Let’s analyze the code contained in 001_FormHandlers.rb#L41-L140.
Instead of touching memory directly, they have two-dimensional arrays in code that draw the spots using the engine’s set_pixel function, pixel by pixel, via software. They have to multiply it by 2 because of how RPG Maker XP works.
| |

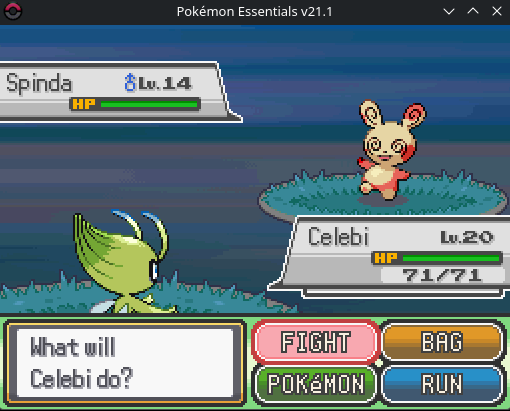
It works well for static images, but it’s terribly inefficient. The big problem arrives when you try to animate the sprite. If Spinda moves its head, the spots remain floating in place because they are painted over static coordinates.
Deluxe Battle Kit to the rescue (Essentials)
To solve this animation problem within the Essentials engine itself, the Deluxe Battle Kit plugin uses a rather ingenious approach, although not very optimal.
The code scans the sprite at runtime frame by frame, looking for the exact color of Spinda’s mouth (230, 99, 115). It measures how many pixels the mouth has moved horizontally and vertically since the previous frame and applies that difference to the spots’ coordinates. Very smart to anchor the spots to the face, but constantly doing pixel scanning on the CPU isn’t the best for performance. To avoid making this post too long and complex, I’m going to omit the code for this section, it’s a bit messy.


YAPU (Unity)
YAPU (Yet Another Pokémon Unity) introduces a giant paradigm shift, as it works in Unity and uses shaders on the GPU. Furthermore, the animations here are 52-frame sequences where the head rotates and changes perspective, so a static displacement would quickly look completely wrong.
To solve this, YAPU’s developer created an external C# tool that pre-calculates a huge data texture (Data Texture or LUT). This image isn’t meant to be seen; rather, it stores mathematical data in its colors. Curiously enough, this is the same technique I use in Elit3D to send tile data for each layer within an image so the GPU can process it rapidly.
In YAPU’s case, the image is 52x4 pixels (52 frames and 4 spots). In the red and green channels of each pixel, it stores the exact base coordinate where each spot should be anchored in that specific frame. Then, Unity’s Shader Graph simply reads those colors, adds the PID’s random offset, and draws the spot. Super fast to run, but very complex and rigid to maintain if you decide to change an animation frame.

Getting YAPU up and running is somewhat complex because it requires non-public assets and several paid plugins that I don’t own. I’ve done all the analysis without being able to verify it, and I generated the LUT with a script that mimics it but isn’t quite the same.
How I did it in Godosters (Godot 4)
After analyzing all this, I had to figure out how to do it in my project. I wanted an intermediate path: run away from the Battle Kit’s CPU scanning and avoid the complexity of YAPU’s external data tool.
Luckily, Godot 4 is incredible with shaders. They are very similar to glsl, easy to make, I like them a lot. My current solution is a hybrid approach:
- I use the Essentials arrays in GDScript code, but instead of drawing on screen with
set_pixel, I convert them once into anImageTexturein memory (creating a mask that I pass to the GPU). - The GDScript script calculates the PID math (the offsets) and passes them as parameters (
uniforms) to the shader. - The Fragment Shader handles everything else. It checks if the current pixel falls within the spot’s mask and applies the mathematical color tinting.
Let’s go step by step. First the script:
To implement this in my project, I opted for a hybrid system that takes the best of both worlds: the ease of use of the Essentials arrays and the extremely high performance of shaders.
I created a SpindaAppearanceModifier class that inherits from our base visual modifiers system. This class has a main function, apply(), which receives the Pokémon instance and the sprite to be rendered.
The strategy is as follows:
- Define the patterns: I reuse the same binary arrays from Essentials to shape the spots.
- Create efficient masks: Instead of drawing the spot pixel by pixel on the CPU, I convert those arrays into a texture (
ImageTexture) using aPackedByteArray. This is a highly optimized technique in Godot that allows building the image all at once, avoiding slow iterations. - Accurate colors: I extracted the exact colors from the original sprite (both for light and shadow). The script assigns normal colors by default and replaces them only if the Pokémon is shiny, keeping the code very clean.
- Calculate coordinates: Using the PID, we read 4-bit groups to extract the offset of each spot (between 0 and 15 pixels), mimicking the GBA math exactly.
- Send to Shader: Lastly, we create a unique instance of the material (to prevent different Spindas from sharing the same positions) and pass all these variables to the shader.
| |
Now onto the shader. The shader receives all the data and only modifies the fragment. First it reads the pixel color from Spinda’s texture and checks that it isn’t transparent. If it’s not, it evaluates each of the four spots. For each spot, it checks that the coordinate falls within its corresponding area and, immediately after, it reads the exact value from that mask to know if it’s supposed to draw there.
If it’s a spot, the shader doesn’t just paint it brutally. First it compares the original pixel color with Spinda’s cream skin tones. Using a smart mathematical blend, it decides what to do: if the pixel is skin, it tints it 100% red, perfectly respecting whether it was lit or in shadow. But if the pixel is part of a facial feature, like the dark lines of the eyes or the mouth, it leaves it intact. This way we ensure the spots integrate with perfect anti-aliasing over the body without erasing the Pokémon’s face.
| |
It’s super fast because the heavy lifting is executed in parallel on the graphics card and it solves the root problem of static painting.

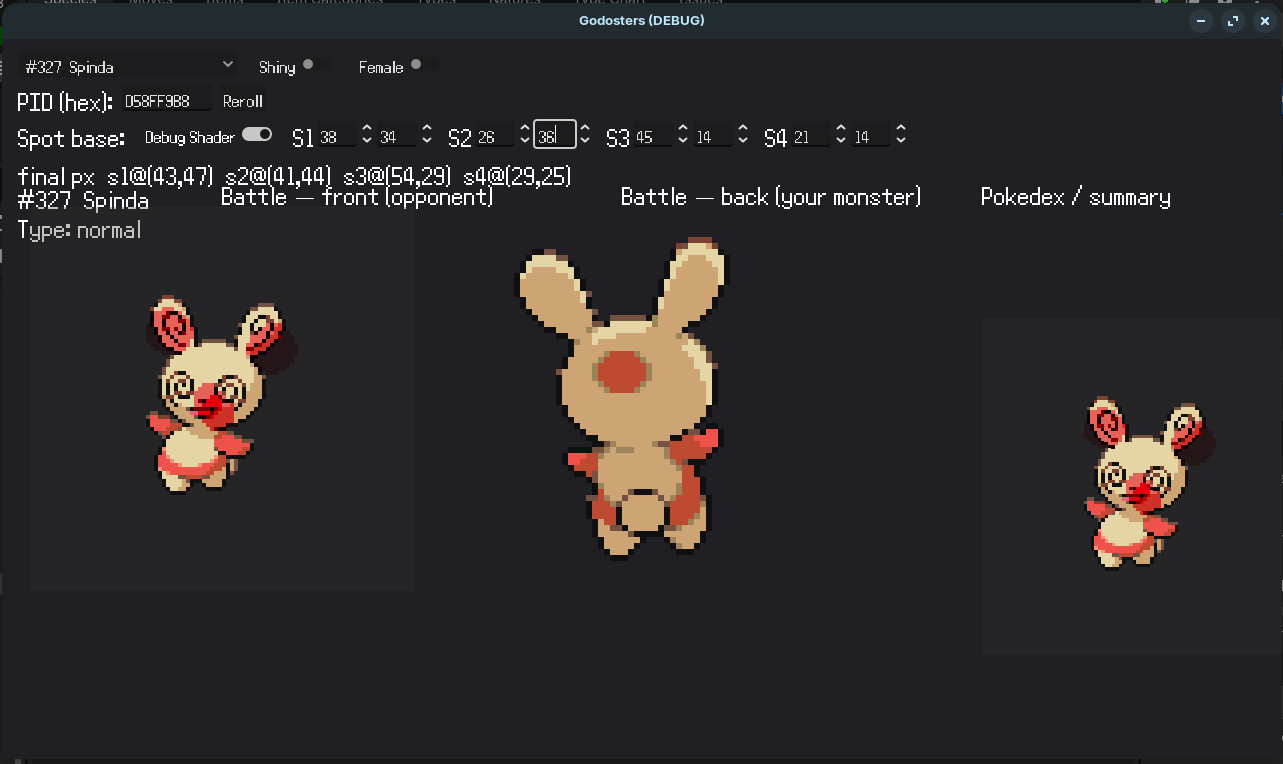
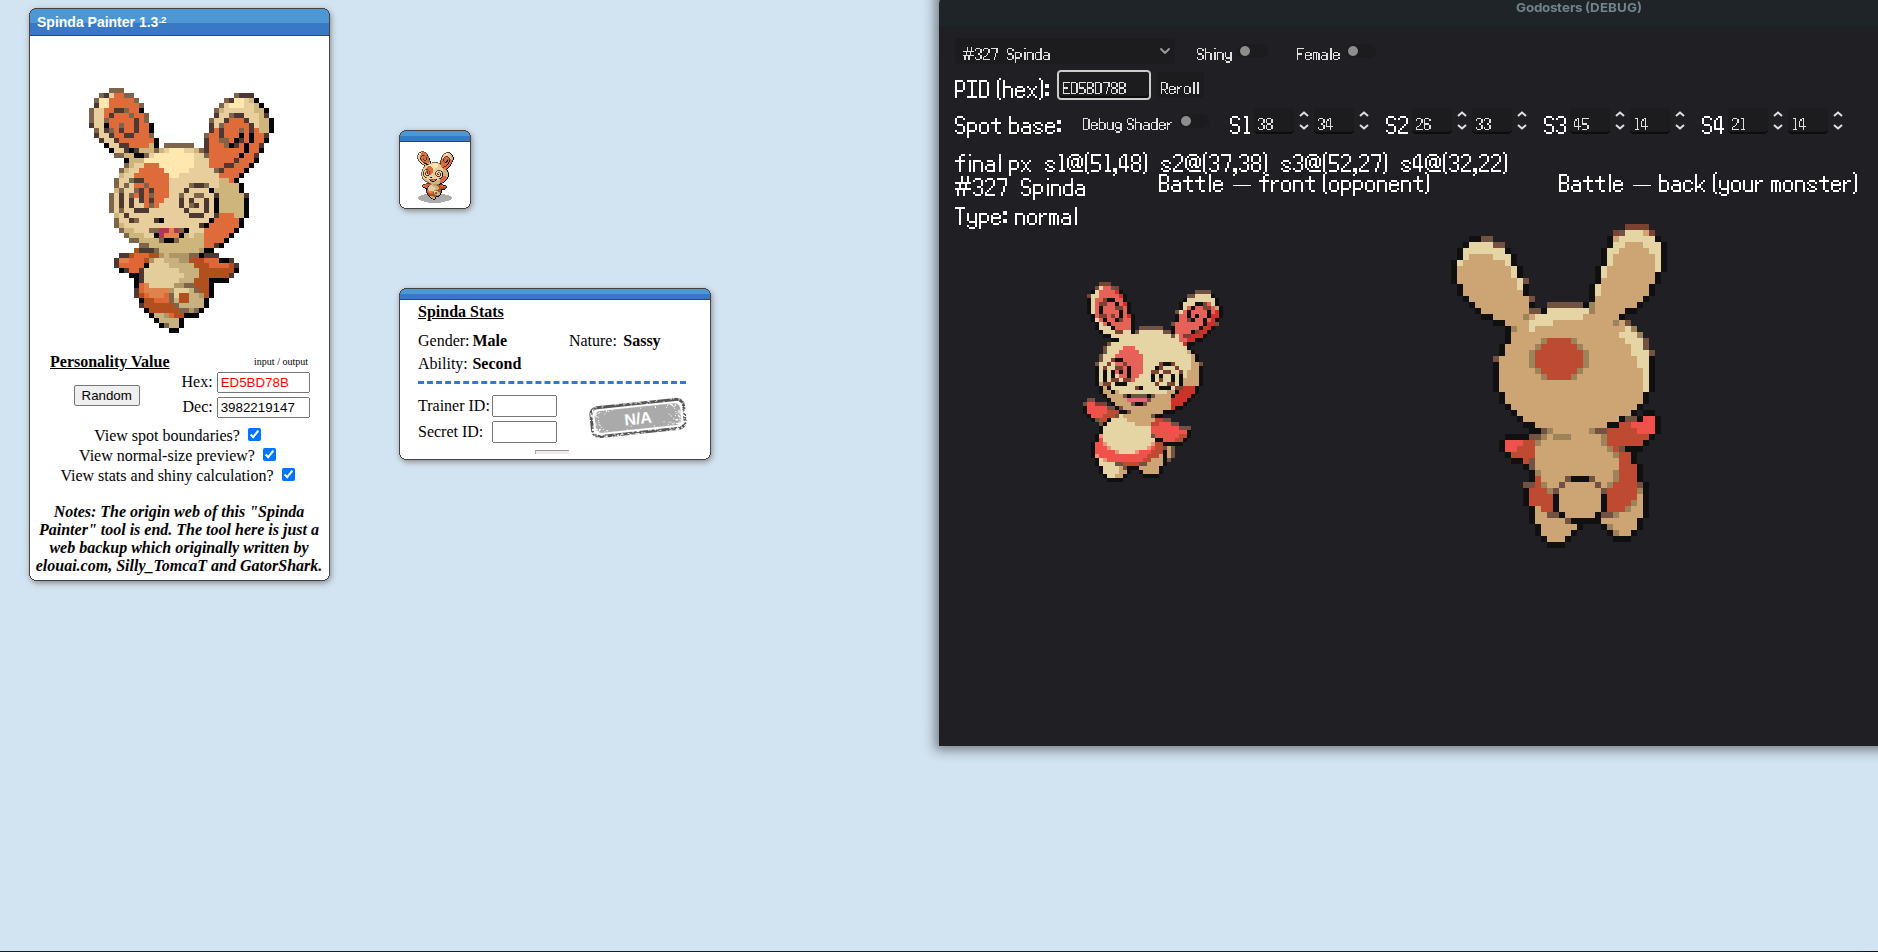
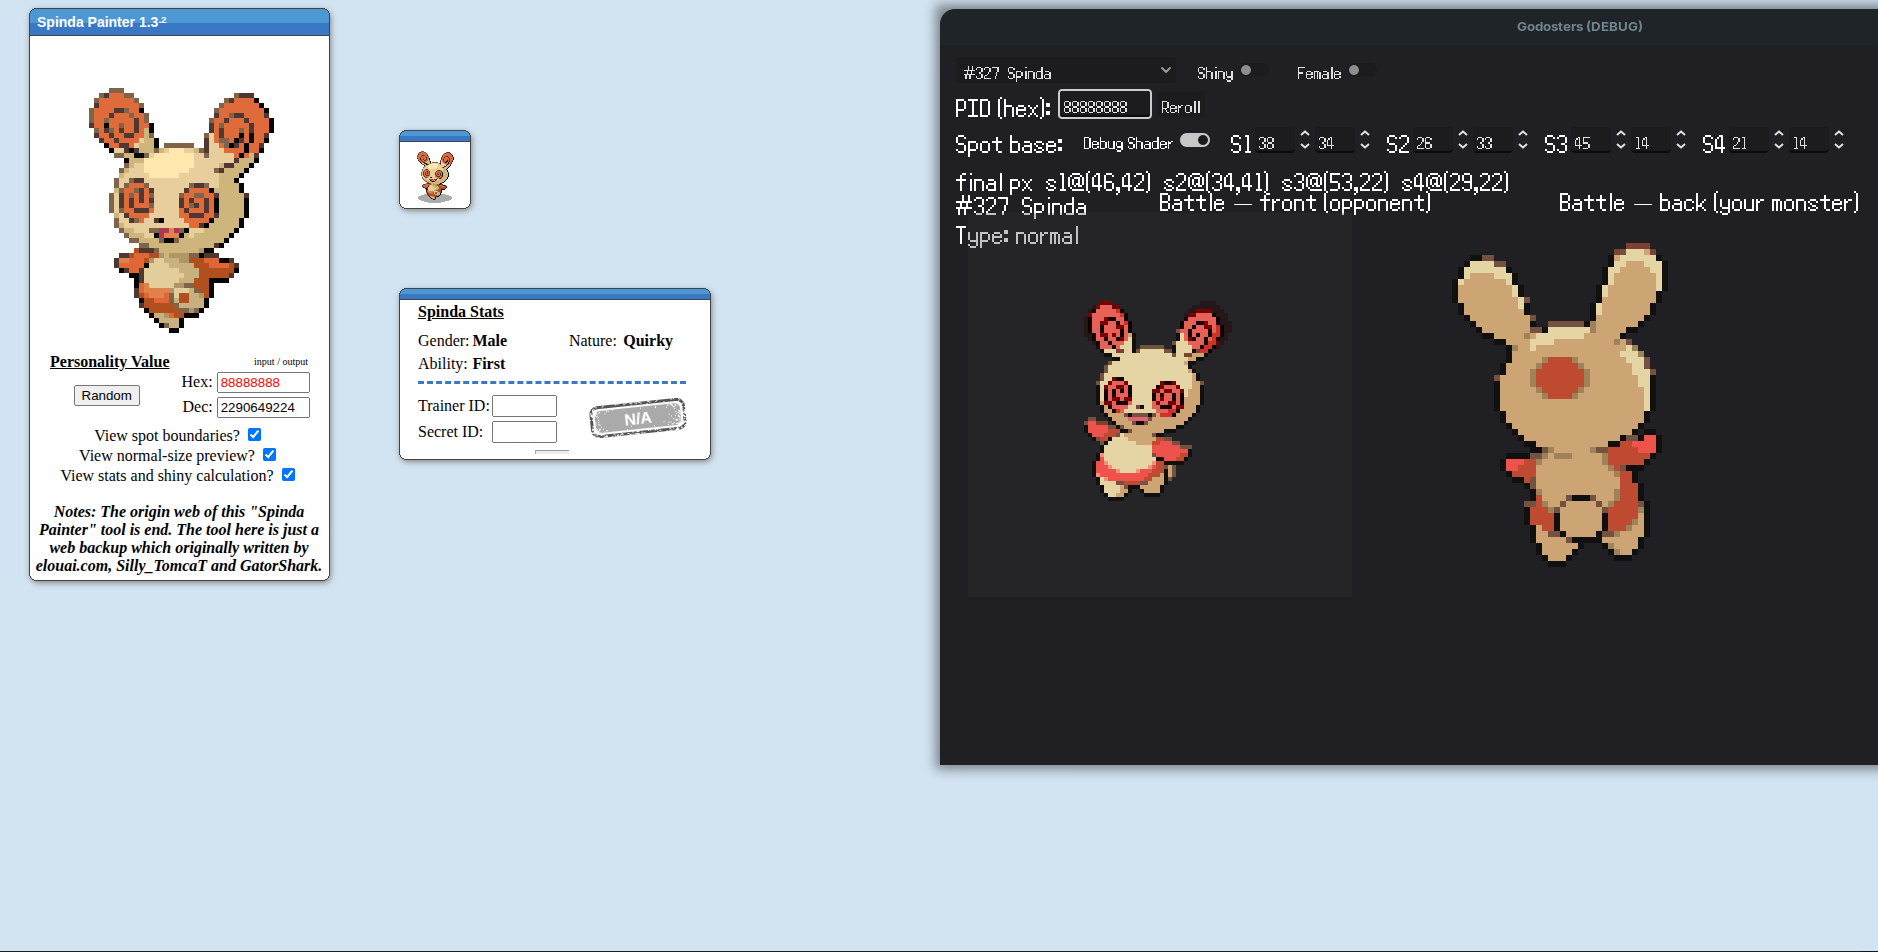
I created a scene in Godot where I could visualize each of the monsters in the database. I made a special case where if the Pokémon had the AppearanceModifiers array, it would add some controls to edit the origin of the spots. This way I could see the exact position of the spots to check the changes I was making.
The future: Native Animations in Godot
Truth be told, I’m quite happy with the current solution, but it still inherits one problem: if I add an animated sprite, the spots will stay fixed just like they did in Essentials.
I’m no expert, but thinking about it, I believe the best possible solution is to take advantage of Godot’s own architecture and the AnimationPlayer node. My idea for the future is to divide the offset into two parts within the shader:
spot1_base: The original position of the spot on Spinda’s body.spot1_pid_offset: The random displacement generated by the PID.
The script will only calculate the pid_offset once when instantiating the Pokémon. For the animation, I’ll simply use Godot’s AnimationPlayer to create a track that moves the spot1_base value frame by frame directly from the editor’s timeline. Thus, the spots will move with the head natively, all on the GPU and without weird external tools.
I could even write a script that scans the mouth colors (like the Deluxe Battle Kit does) inside the editor, and automatically generates the AnimationPlayer keyframes for me so I don’t have to do it by hand, frame by frame. The best of both worlds with perfect performance in the final game.
Another technically flawless option would be to ditch spritesheets altogether and animate by parts using 2D skeletons (like they did in Gen 5). This way, Spinda’s head would be an independent Godot node and the shader would apply only to that piece. As you animate and rotate the head, the spots would rotate perfectly anchored to it natively. But honestly, animating, slicing, and rigging almost a thousand critters by hand is absolute madness. So I’ll stick with frame-by-frame animation; even if it requires programming workarounds, it’s infinitely faster on a production level since the assets are already all set on the internet.
What about current 3D games?
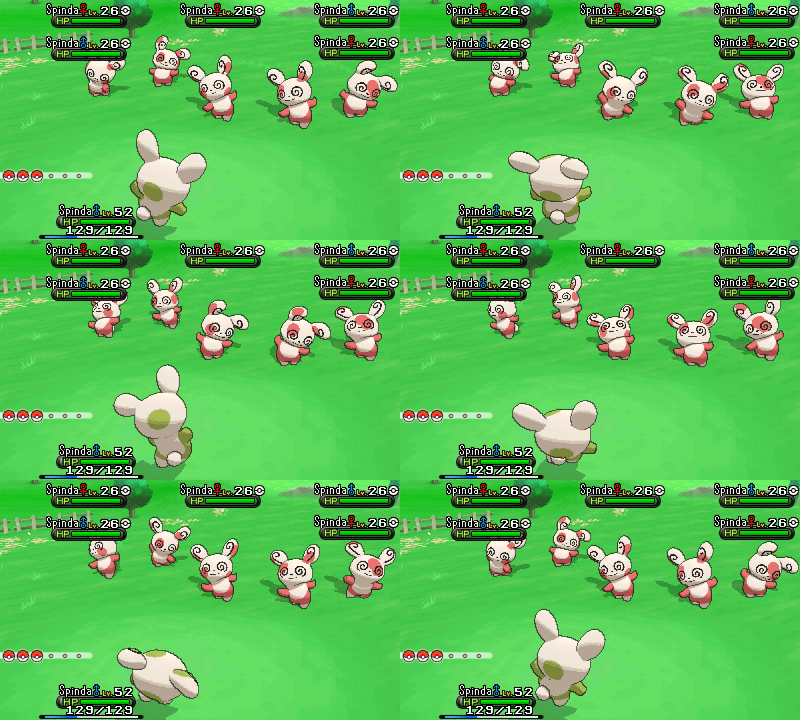
Although 3D is totally out of scope for Godosters (not for the maps, that’s why Elit3D was born), it’s curious to think about how Game Freak solved this very problem starting with Pokémon X & Y. With 3D models, the problem simply vanishes: Spinda has a 3D mesh attached to a skeleton. The spots are calculated by passing the PID to the material’s shader, which draws the spots directly on the head’s UVs. When the 3D skeleton moves in any animation, the texture and UVs move with the model 100% natively.
The curious case of Pokémon Brilliant Diamond and Shining Pearl (ILCA)
To wrap up, it’s worth mentioning the disaster that happened with Spinda in the Diamond and Pearl remakes developed by ILCA.
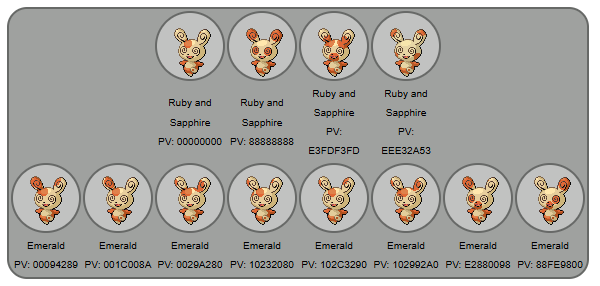
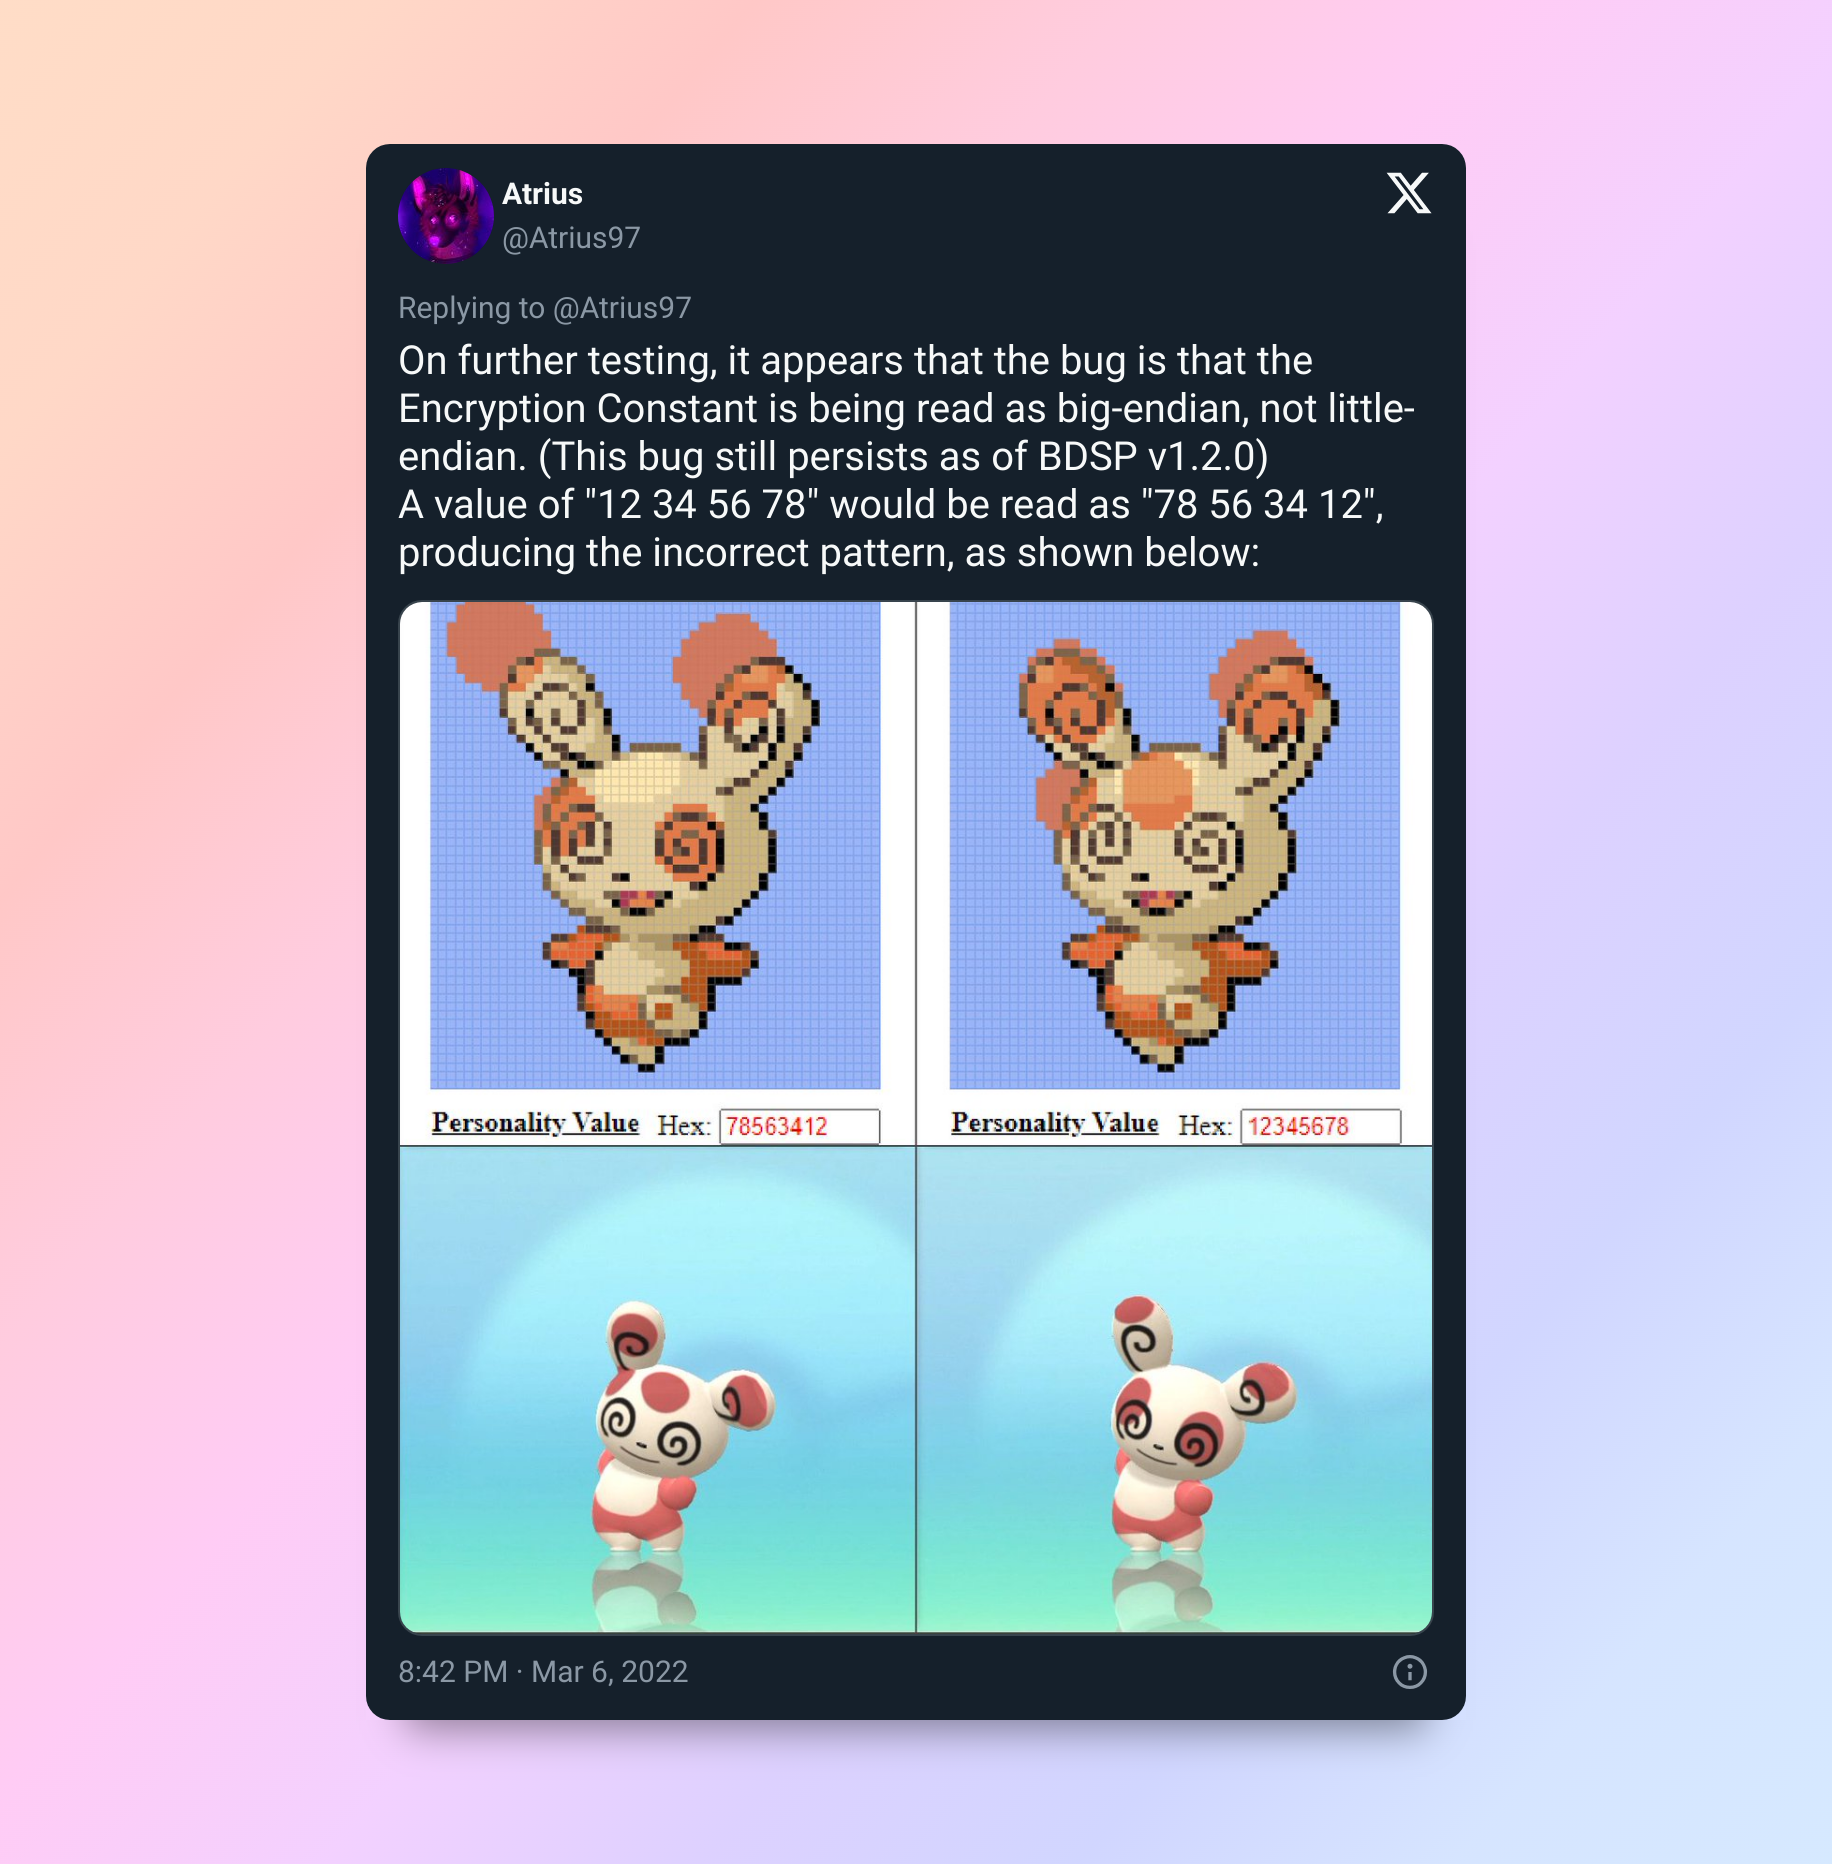
When replicating this mechanic in Unity, the studio made an Endianness (byte order) error when reading the PID. Since the rest of the series uses Little Endian and they assumed Big Endian, they ended up reading the 32 bits literally backwards. For example, a hexadecimal PID value like 12 34 56 78 was read as 78 56 34 12.
The visual result was catastrophic: the spot pattern generated in BDSP was completely different from what that same number would produce in any other game. This caused a critical clash with Pokémon HOME (curiously also developed by ILCA), which did read the PID correctly. If you transferred a Spinda from one game to another, its spots would magically rearrange themselves.
Since fixing the bug after the fact would have altered the Spindas players already had in their save files, the solution was drastic: they completely banned transferring Spinda. Today, any Spinda caught in BDSP is trapped in that game forever just because 4 bytes were read in the wrong order.
In the following image (courtesy of @Atrius97) you can see the demonstration: they generated two Spindas with their PID bytes intentionally swapped to see how the versions generated in Pokémon Emerald (correct) clash with BDSP (read error).
By the way, if your curiosity is piqued and you want to play around with Spinda’s spots without having to touch code, I highly recommend taking a look at Spinda Painter. It’s an awesome web tool that lets you paint and visualize the pattern of any Spinda knowing its PID and vice versa. It was really helpful throughout this whole investigation to check things on the fly.
And that’s all for today. It’s been a slightly denser post than usual, but I really wanted to document all this research because I find it fascinating how the community has solved this design problem over the years.
Changing the subject a bit, the truth is I’ve been working quite a lot on Godosters lately and I’ve made a ton of progress. That being said, the project is still very unstable under the hood and I want to make sure it’s solid before publishing and officially showing it. I’ll soon show you in detail the new systems I’ve integrated and what the current landscape of everything looks like.
I hope you found it useful. Dropping a like, an emoji, or a comment down below is greatly appreciated.
See you next time!